Configuring a WhatsApp Gupshup Bot
This guide provides step-by-step instructions on how to configure a WhatsApp Gupshup bot, including obtaining the required credentials. Follow these steps to set up integration with Gupshup for WhatsApp Business.
Getting Credentials:
Visit Gupshup Console:
- Go to Gupshup Console and log in using your credentials.
Create your app:
- Click on "Create your first app" button. Select "Access API" from the next page. Enter the name of your app and then click "Submit".
Select App:
- Click on the App name in the dashboard.
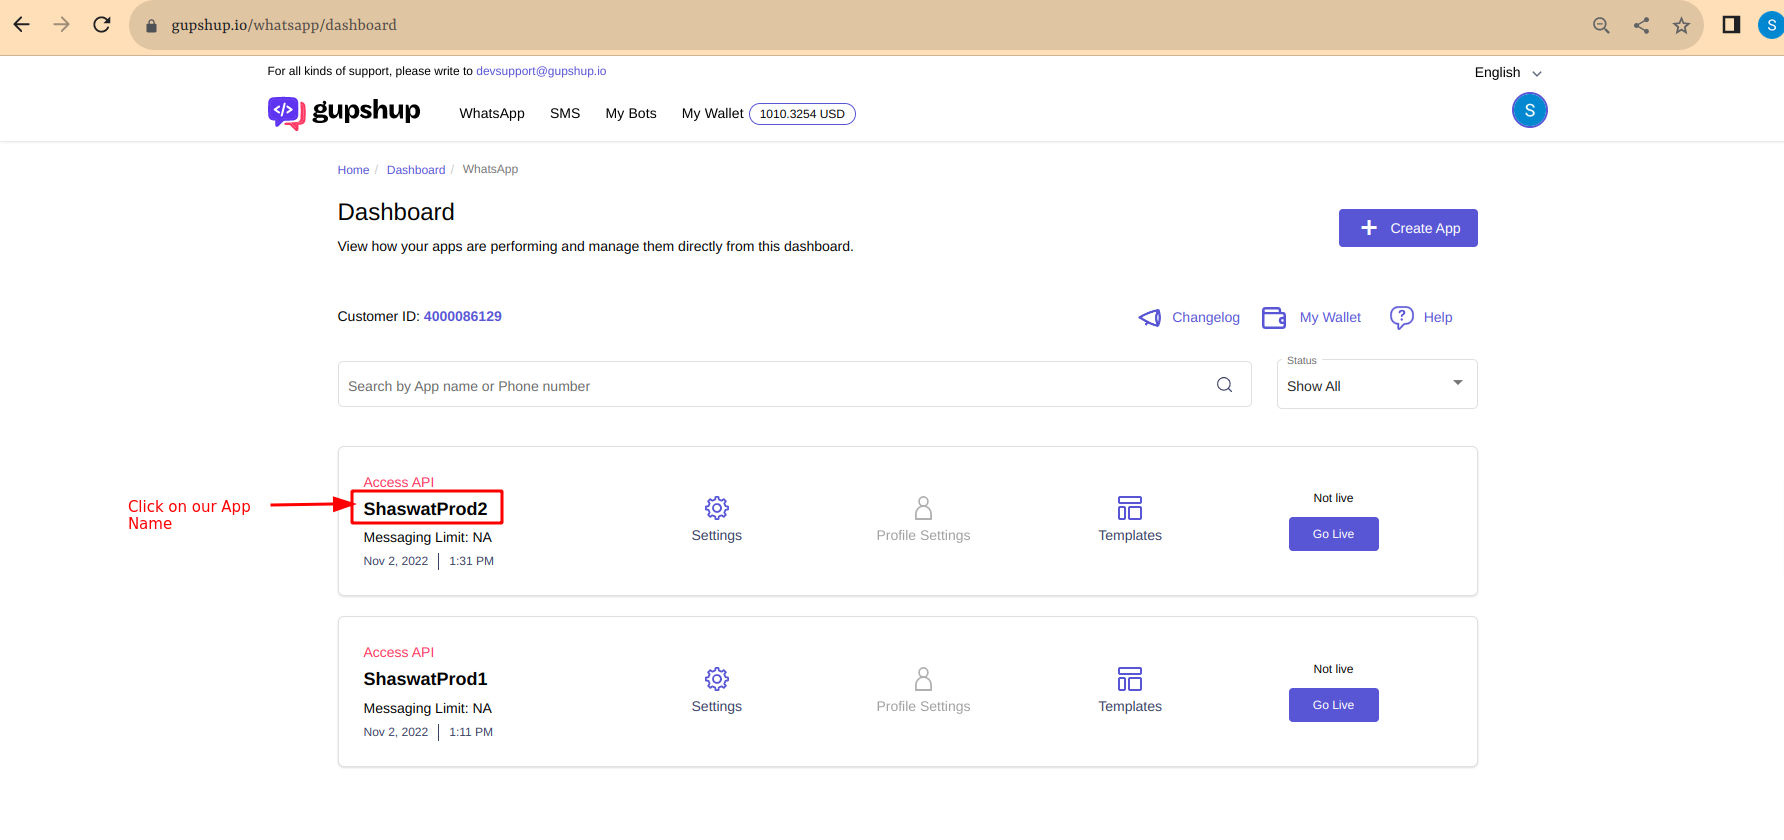
- Click on the App name in the dashboard.
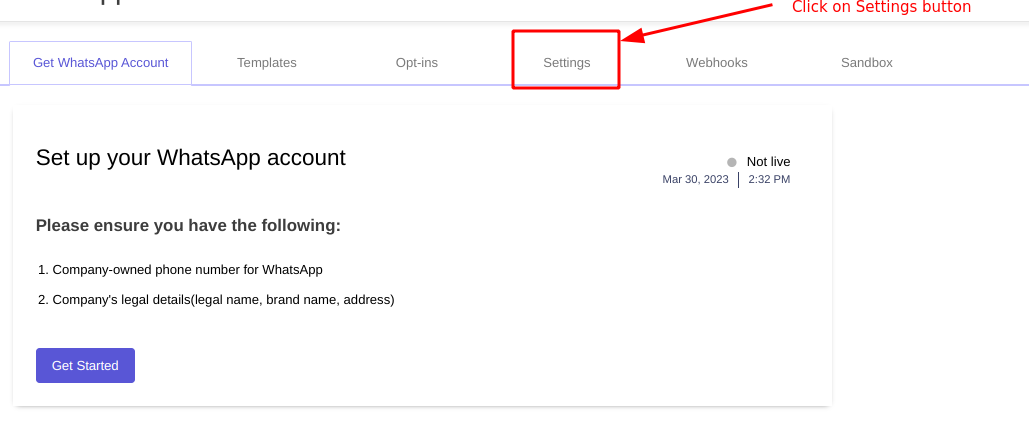
Access Settings:
Navigate to the Settings tab by clicking on the Settings button to obtain App Name, App ID, and API Key.
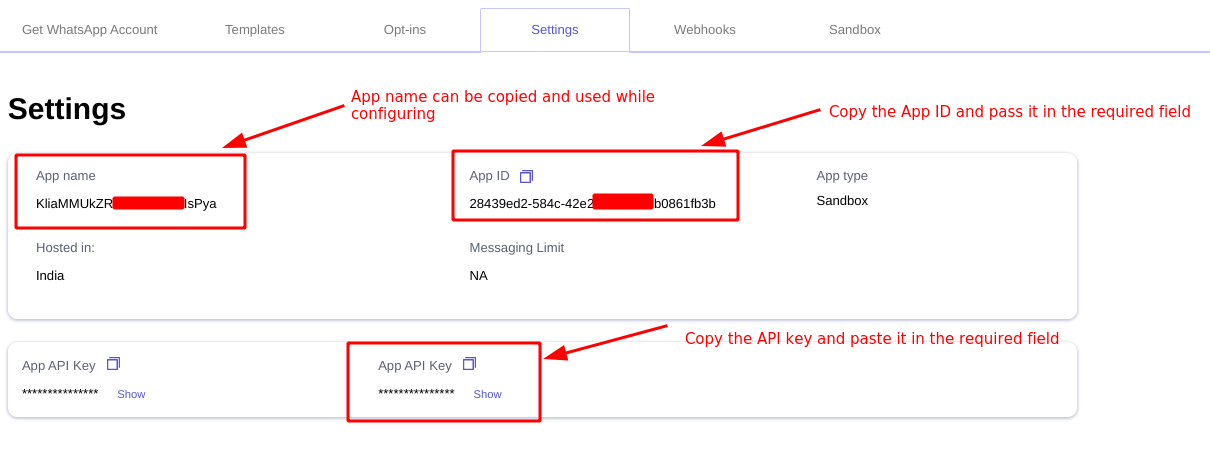
Details to retrieve from Settings page:
- App Name
- App ID
- API Key
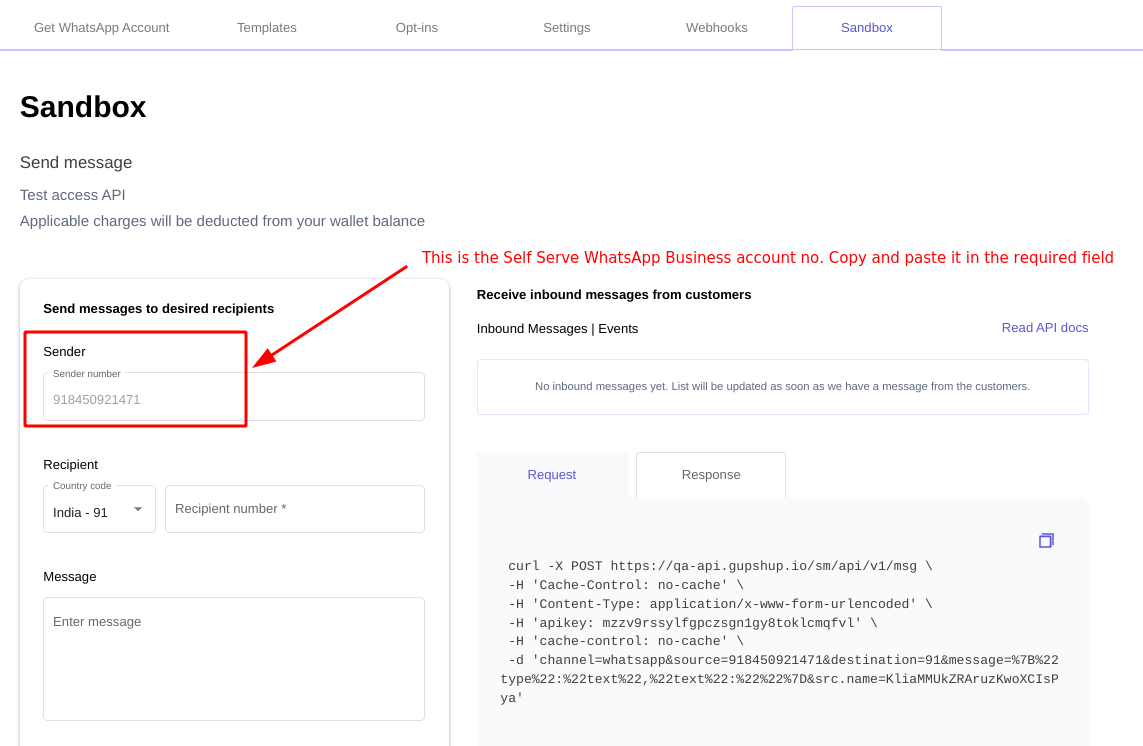
Find WhatsApp Business Number (WABA Number):
For the Self-Serve WhatsApp Business Account number, go to the Sandbox tab by clicking on the Sandbox button.

The Self-Serve WABA number is displayed in the Sender number field. Copy and paste this number into the required field during the configuration process.
Webhook Setup Guide
To establish the webhook, follow the steps outlined below. Ensure that the webhook is configured on Gupshup's end, and the request flow should follow this pattern:
Nginx Configuration
- Set up a singular proxy server with Nginx running on it. Modify the Nginx configuration file as follows:
server {
    listen [::]:80;
    listen 80;
    server_name example.com; # Replace with your domain

    root /var/www/html;
    index index.html index.htm index.nginx-debian.html;

    location /{phone}/gupshup/whatsapp {
        proxy_pass https://{YOUR_INBOUND_URL}/inbound/bot/{BOT_ID};
    }
}
{phone}: Replace with the variable representing the phone number associated with the bot.{YOUR_INBOUND_URL}: Replace with the actual URL of your inbound server.{BOT_ID}: Replace with the unique identifier for your bot.
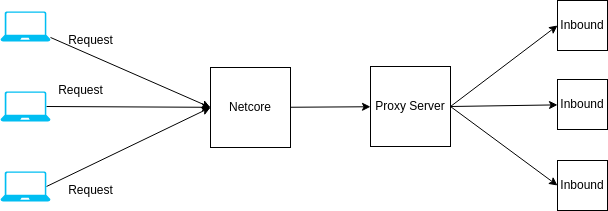
Request Flow
The incoming request from the bot will be forwarded by Netcore to the designated proxy server with Nginx.
The proxy server, configured with the provided Nginx settings, will direct the request to the appropriate inbound server based on the specified phone number and bot ID.
By implementing this configuration, a single set of WhatsApp credentials from Gupshup can efficiently manage multiple bots, streamlining the webhook setup process. Adjust the configuration parameters to suit your specific domain, phone number, inbound URL, and bot IDs accordingly.
Configuration Steps:
Use Collected Credentials:
- Utilize the gathered credentials (App Name, App ID, API Key, and WABA Number) for your bot integration. Refer here for refrence.
Note for Callback URL Setup:
- For recieving incoming messages, you need to setup a webhook on which gupshup will forward the incoming messages. This should be in the following format
https://{YOUR_INBOUND_URL}/inbund/bot/{BOT_ID}Here
BOT_IDis the id of the gupshup bot that you created. Please note that the webhook should be setup after creating the bot, not before that. Follow this guide for creating your first bot. After creating the webhook, send an email to Gupshup team to get it working.